PASOS PARA EL CAMBIO DE UNA CORREA DE DSITRIBUCIÓN O TIEMPO DEL CHEVROLET AVEO MOTOR 1.6L E-TECII
CHEVROLET AVEO ENGINE 1.6L E-TECII, TIMING BELT SERVICE AND REPAIR
SI TE INTERESAN DATOS DE REPARACION DEL FORD FIESTA 1.6 (2002-2008) SIGUE ESTE BLOG MANUALES FORD FIESTA
SI TE INTERESAN DATOS DE REPARACION DEL FORD FIESTA 1.6 (2002-2008) SIGUE ESTE BLOG MANUALES FORD FIESTA
Tool required: - Timing belt adjuster
- Angle meter
- Angular torque gage
REMOVAL PROCEDURE:

2 - Disconnet the intake air temperature (IAT) sensor connector.
3 - Disconnet the air intake tube from the throttle body.
4 - Disconnet the breather tube from the valve cover.

6 - Remove the air filter housing.
7 - Remove the right front whell.
8 - Remove the right front splash shield.

9 - Remove the accesory drive belt.
10 - Remove the crankshaft pulley bolt.
11 - Remove the crankshaft pulley.

12 - Remove the upper front timing belt covers bolts.
13 - Remove the upper front timing belt cover.
14 - Remove the lower front timing belt cover bolts.
15 - Remove the lower front timing belt cover.
16 - Remove the power steering pump mounting bolts.
17 - Install the crankshaft pulley bolt.

http://www.autolavadoelramonal.es/
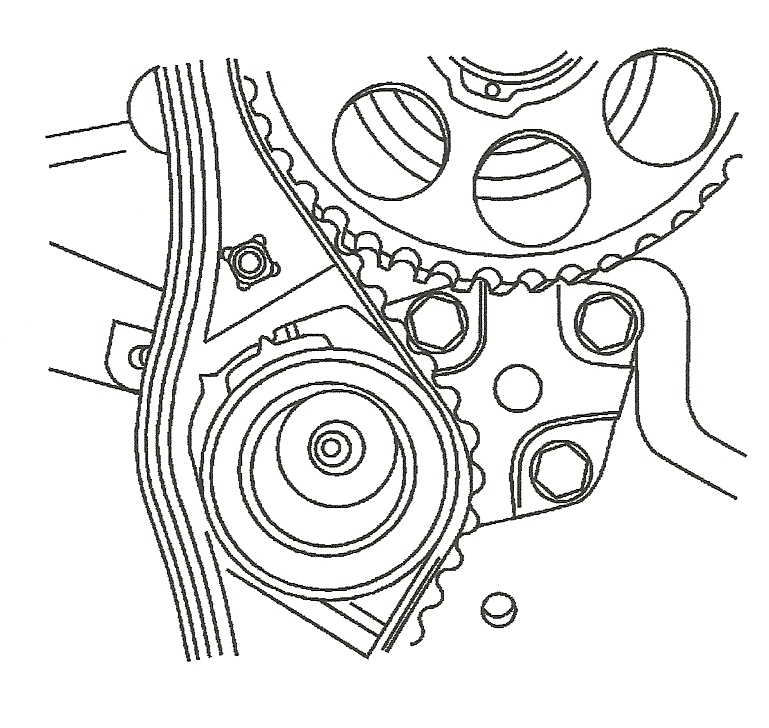
18 - Using the crankshaft pulley bolt, rotate the crankshaft clockwise until
18 - Using the crankshaft pulley bolt, rotate the crankshaft clockwise until
the timing mark on the crankshaft gear is aligned with the notch at
the bottom of the rear timing belt cover.

19 - Slightly loosen the coolant pump retainig bolts.
20 - Using the timing belt adjuster, rotate the coolant pump counterclockwise
to release the tension on the timing belt.

21 - Remove the timing belt
INSTALLATION PROCEDURE:

1 - Aling the timing mark on the crankshaft gear to the notch on the bottom
of the rear timing belt cover.

2 - Aling the timing marks on the camshafts gears.
3 - Install the timing belt.
4 - Rotate the coolant pump clockwise using the timing belt adjuster.
5 - Rotate the coolant pump clockwise until the adjust arm pointer of the
timing belt automatic tensioner is aligned to the notch in the timig belt
automatic tensioner bracket.
6 - Tighten the coolant pump retainig bolts.
7 - Rotate the crankshaft (2) full turns clockwise using the crankshaft pulley
bolt.
8 - Loosen the coolant pump retaining bolts.
9 - Rotate the coolant pump until the adjust arm pointer of the timing
belt automatic tensioner is aligned with the pointer on the timing belt
automatic tensioner bracket.

10 - Tighten the coolant pump retaining bolts.
Tighten the coolant pump retaining bolts to 10 Nm (89 inch lbs.)
11 - Remove the crankshaft pulley bolt.
12 - Install the upper and lower front timing belt over.
13 - Install the upper and lower front timing belt cover bolts
Tighten the upper and lower front timing belt cover bolts
to 10 Nm (89 inch lbs.)
14 - Install the crankshaft pulley.
15 - Install the crankshaft pulley bolt, tighten the crankshaft pulley bolt
to 95 Nm (70 ft. lbs.) using a torque wrench. Using the angle meter
or the angular torque gage, tighten the crankshaft pulley bolt 30 degrees
plus 15 degrees.
16 - Install the accesory drive belt.
17 - Install the right front splash shield.
18 - Instal the right front whell.
20 - Install the air filter housing bolts.
Tighten the air filter housing bolts to 8 Nm (71 inch lbs.)
21 - Connect the air intake tube to the throttle body.
22 - Connect the breather tube to the throttle body.
23 - Connect the IAT sensor connector.
24 - Connect the negative battery cable.
No hay comentarios:
Publicar un comentario